Pouring concrete slabs Melbourne correctly can produce a sleek and long-lasting surface. To avoid costly mistakes, it's essential that you understand how to lay a slab before beginning construction.
Start by clearing out the area where you plan to pour your concrete slab. Mark out its shape using stakes and string, making sure all corners are equal.
Sub-Base
For any slab to remain strong and long-lasting, its foundation must be strong. A basic solution may involve simply laying 75mm of DTp1 down and compacting it thoroughly; for heavier duty applications like driveways it may be beneficial to lay 150mm.
Once this foundation is in place, additional excavation may be necessary if footers are needed to support your building or use of concrete.
Once your base has been laid and compacted, the next step should be installing a damp proof membrane (dpm). This will protect your concrete from becoming damaged when moisture begins to set it. When in doubt about what specific steps may be necessary in your location or state, always consult a local expert. In addition to consulting them regarding required steps or any special considerations. Check with local authorities regarding planning permission or permits as they might also apply to this project.
Forming
Use a screed to use shape your concrete slab by leveling ridges and filling any voids, starting as soon as the first batch hits its subbase.
If your slab will be used as part of a floor or other heavy-duty project, footers may need to be constructed around its edges in order to support it and avoid heave and breakage in cold climates.
After your slab is formed, the next step should be smoothing it. When ready, bleed water should have stopped flowing freely and pressing your finger into the concrete will not result in more than an inch sinkage.
To achieve a clean finish on your slab, use a concrete float or darby to level out ridges and slightly embed aggregates. A bull float may also help create more texture on larger projects - when finished, your concrete should have neat, round edges.
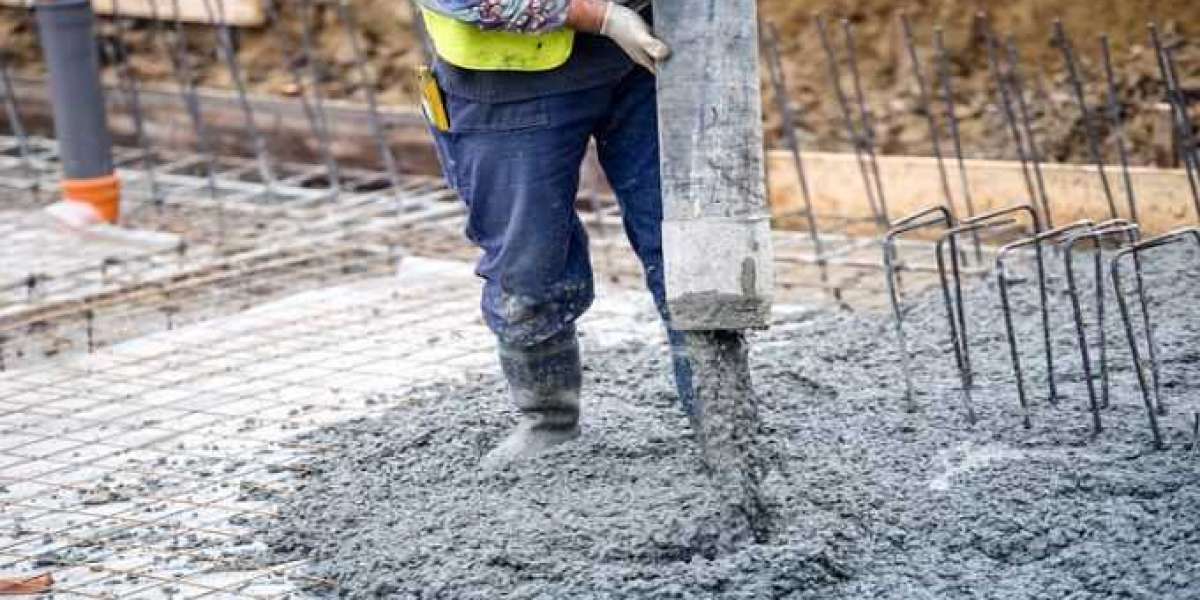
Pouring
If you want your concrete slab to last as long as possible, expansion joints should be added for extra durability. They help minimize uncontrolled cracking that could compromise its aesthetics and durability, using handheld groovers to score expansion joints into its surface; each joint should penetrate approximately 1/4 of its depth - one inch for four-inch-thick slabs - with proper spacing between grooves for uniform appearance.
Once your concrete has set, it's important to float its surface. This process helps smoothen out its texture for an aesthetically pleasing result; you can either do this by hand or with a bull float for larger projects.
Dividing large slabs into multiple portions and pouring them on separate days is often best practice, making the concrete easier to manage as it sets and helping reduce risks that could become hard to correct later.
Finishing
Finishing a concrete slab is key to its final result and a key area where a DIYer can truly make their mark on a project. To do it effectively requires both skillful eye and the appropriate tools; timing is also vital since each step depends on its condition - such as being dry before beginning smoothing process; to test if its ready press your finger into it to see if sinks up to your first knuckle when tested with finger.
Once the concrete has set up, use a magnesium float to level its surface and push down any lumps. Do not overdo this process as too many passes could overwhelm its surface with water and weaken it further.
Finishing concrete helps prevent cracking and creates an appealing look. If the slab is particularly large, however, you may have to divide it up and complete each section individually.